
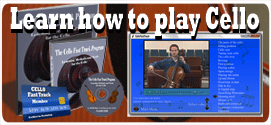
More details on the cello fast track program
Order the program here.
Category Archives: Music
How to play the Cello
Practicing
Customize your practice times to fit your life. I have had to change my practice schedule almost every five to six months. At first, I practiced at night. Then I found that practicing in the morning worked better. At other times, I actually drove to another building in the morning to find a quiet place to practice. Now, years later, I’m back to practicing at home at night. I recommend practicing for at least 30 minutes every other day as a bare minimum. If you can practice for an hour, then that will help you get past the “beginner  stage” even faster. If your schedule permits daily practice, then that will be even better. I do recommend taking one day off per week to give your mind and muscles a rest. Break your practice times into smaller sections of five minutes. Each practice should include some scales in the key in which you will be playing that day. When first starting, the key of D will be used most often. Music played in the key of D will keep you in the “first position.” Your first few weeks should include warm-ups in D major, followed by a beginner cello piece. Then play any music for your own enjoyment at the beginner level. Playing music that you enjoy is an important method for learning faster and growing musically.The cello fast track program includes musical pieces that will give you a well-rounded start. When I first started, I played most of the music that was included in my beginner books, but it seemed that there was always some music that was not as enjoyable as the rest. Make an effort to play each piece as you progress and stop playing the pieces that you don’t enjoy musically.
Motivation
As much as I love the cello, I can say that some days I need more motivation. I find myself on the couch after a long day, and I can’t seem to get up. I try this “trick” on myself, and it often works. I think, “I need to practice for the performance this weekend but don’t want to do a full thirty-minute practice.” I then tell myself, “Okay, Kyle, then at least play one scale and that new music and be done for the day with a ten-minute practice.” Before I know it, I’ve done the scale, started playing Bach, an hour passes, and I can’t put the cello down! Other days, I just do the ten-minute practice and call it a day. Your first two to four months will be the most important of all. This will get you past the beginner stage to where you can produce a good tone and sound less like a novice. As you work past the beginner stage, you will become more motivated. Don’t try to cram a whole week’s worth of practice into one day. Regular practice every other day or every day will build up your playing skills much better than cram sessions. With regular practice, you will become better, and your motivation will start to form from new musical experiences, playing new music, or practicing for a new show, gig, or just a fun musical session with family or friends.
Cello Parts
The cello doesn’t look that complicated from the start. Besides being very large, this instrument has an amazingly specific design. Every part of the cello, including features that appear to be for decoration, like the small holes on the front of the instrument, are necessary for achieving the low tone beloved by listeners around the world.

The Body of the Cello
The cello’s body can be made from wood, carbon fiber, or even aluminum. Wood is the most common and traditional choice, usually a spruce/maple combination, or more rare poplar and willow. Cheaper cellos may use lower quality materials like laminated wood. Cheaper cellos are also factory produced, while higher quality cellos are carved by hand. The cello’s body has a wide top section, a narrower middle section, and a wide bottom section, somewhat resembling an hourglass shape. The cello’s front has a bridge, which holds the strings up from resting against the wood. Also, holes shaped like the letter “f” are on the front of the cello, and these holes play an integral role in the cello’s sound. A decoration known as “purfling” helps preserve the integrity of the cello, helping to protect the instrument from weathering damage and cracks.
The Neck and Strings of the Cello
The neck of the cello extends above the huge body. Attached to the neck is the fingerboard and various other parts to fashion the strings on. Cellists can choose from a wide array of strings, mostly made of metallic materials wound around a gut, metal, or synthetic core.
The Bottom of the Cello
At the cello’s bottom, we find the tailpiece and endpin. The part called the “tailpiece” secures the strings to the lowest part of the cello. The tailpiece may be made of plastic, steel, or a hard wood such as ebony. The “endpin” is the spike added on during the 19th century to improve the support of the cello during playing. The endpin can be made of carbon fiber, metal, or wood. Endpins these days may even be removable, retractable, or adjustable in height.
The Insides of the Cello
Inside of the cello is a bass bar and a sound post. The bass bar works to support the structure of the instrument and handle the vibrations caused by playing. The bass bar is located under the bass foot of the bridge. The sound post is wooden, round, and under the treble side of the bridge. This piece of the instrument connects the cello’s back and front. Both of these parts are vital in distributing the vibrations to the proper parts of the cello.
The Bow
Every single part of the cello is vital to its performance, and must be cleaned and cared for to produce the most beautiful music the instrument is

capable of.The bow, is most often made from a very particular type of wood from the pernambuco or brazilwood tree. This wood is very dark and heavy, and as a bow it channels the vibrations of the cello well. Bow hair can come from horses or found synthetically manufactured.